I wrote about one of my favorite hot-spot honeypot tools known as the WiFI pineapple Mark IV last year HERE. The pineapple only cost $100 dollars and can be found at the HAK5 store.
To summarize what this bad boy does, it is a small portable attack tool that can run things such as Karma used to spoof trusted SSIDs and SSL strip to remove trusted connections while sniffing traffic. So for example, lets say your home network is PUPPYDOG123. When you’re at home, your wireless devices will look for PUPPYDOG123 and connect if they see it. When the pineapple is present and running Karma, it can say back “Hey, I’m PUPPYDOG123 … connect to me”. Your device will think its your network and connect. Traffic will go through the Pineapple so you think you are on a trusted network however the pineapple is between aka a man-in-the-middle attack.
The pineapple can also run SSL strip. This forces attempts to use encryption aka HTTPS to non-encrypted channels aka HTTP (we can all thank moxie marlinspike for this concept). So lets say you access Facebook. The pineapple will force you to use http so your traffic is in the clear. When you log in, it will see your user name and password. Lets set this up now with the Pineapple Mark V.
The Pineapple Mark V
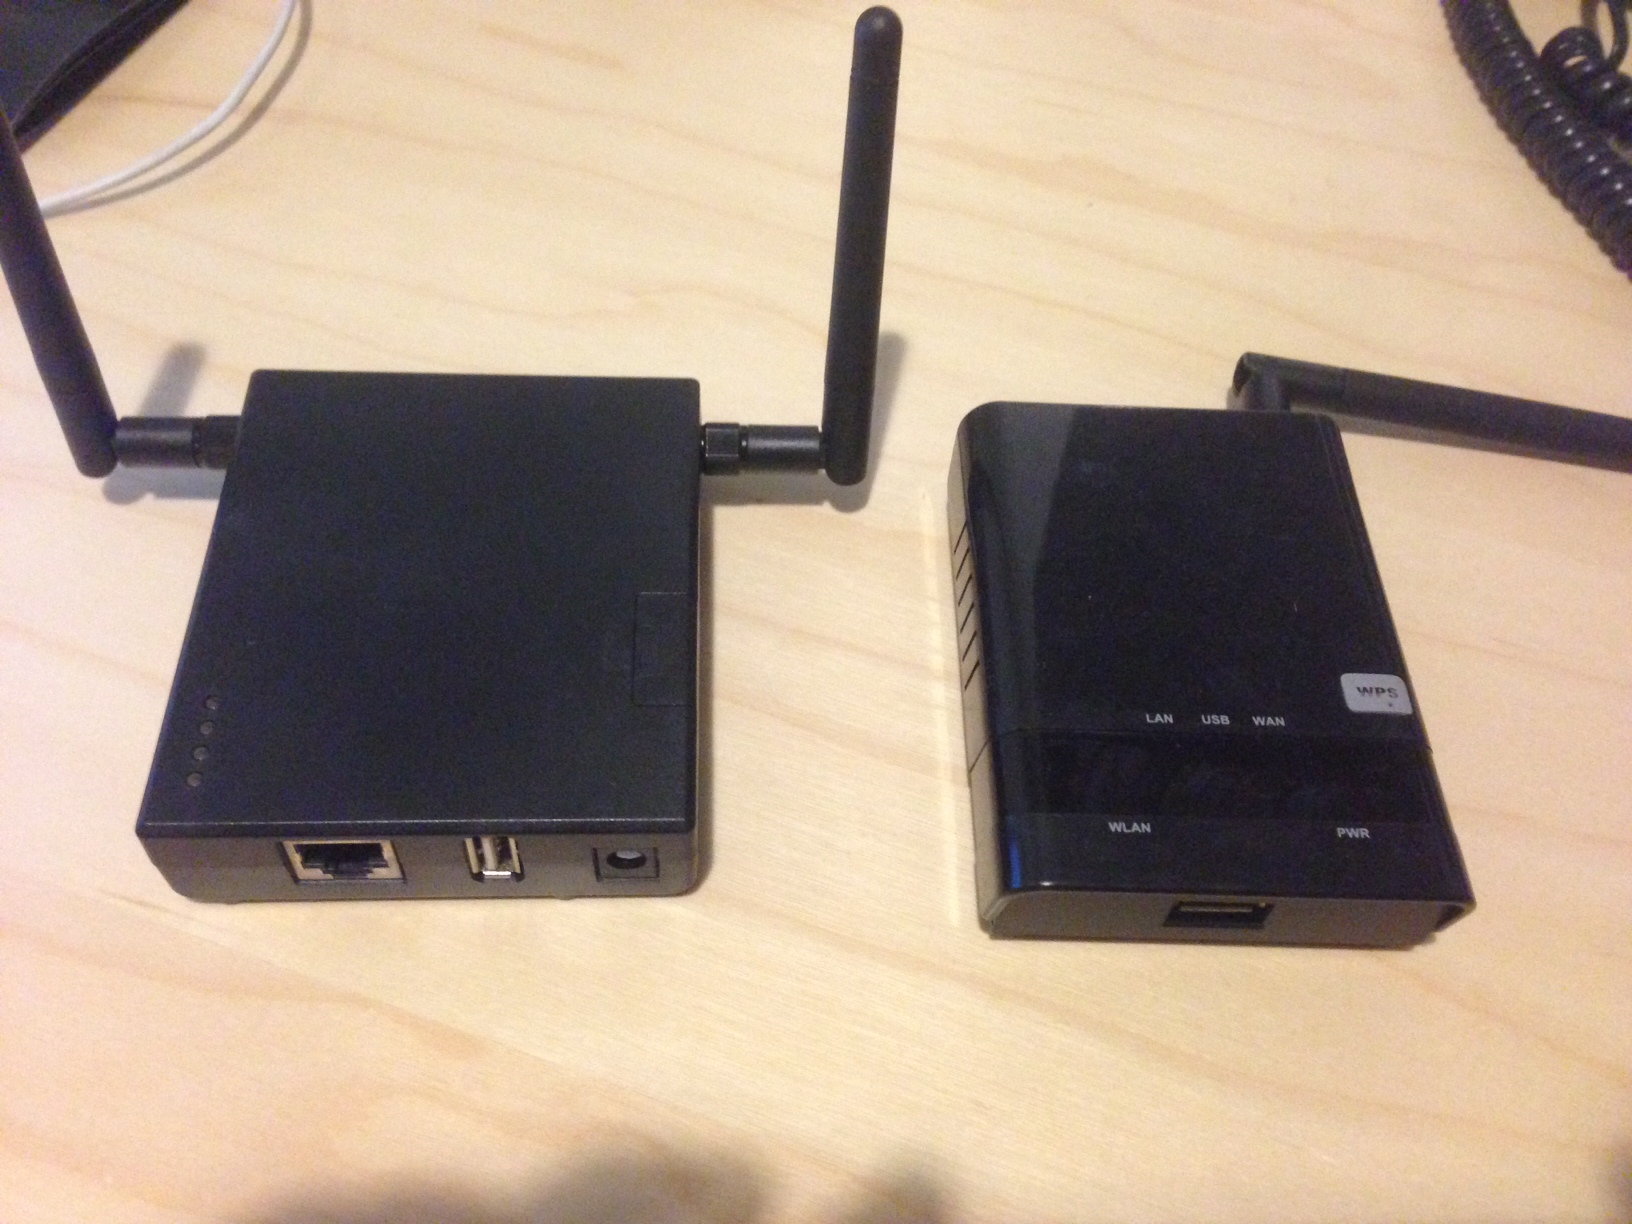
Comparing my new Mark V to my older Mark IV
This picture shows my older Mark IV and the new Mark V. The major new features I found useful were the second antenna to connect to other networkers (aka client mode), the mode selection switches (aka set it up without having to log into the GUI), flash card and its faster speeds. See the HAK5 website for more details.
Step 1: Access the GUI
WiFi Pineapple first time login screen
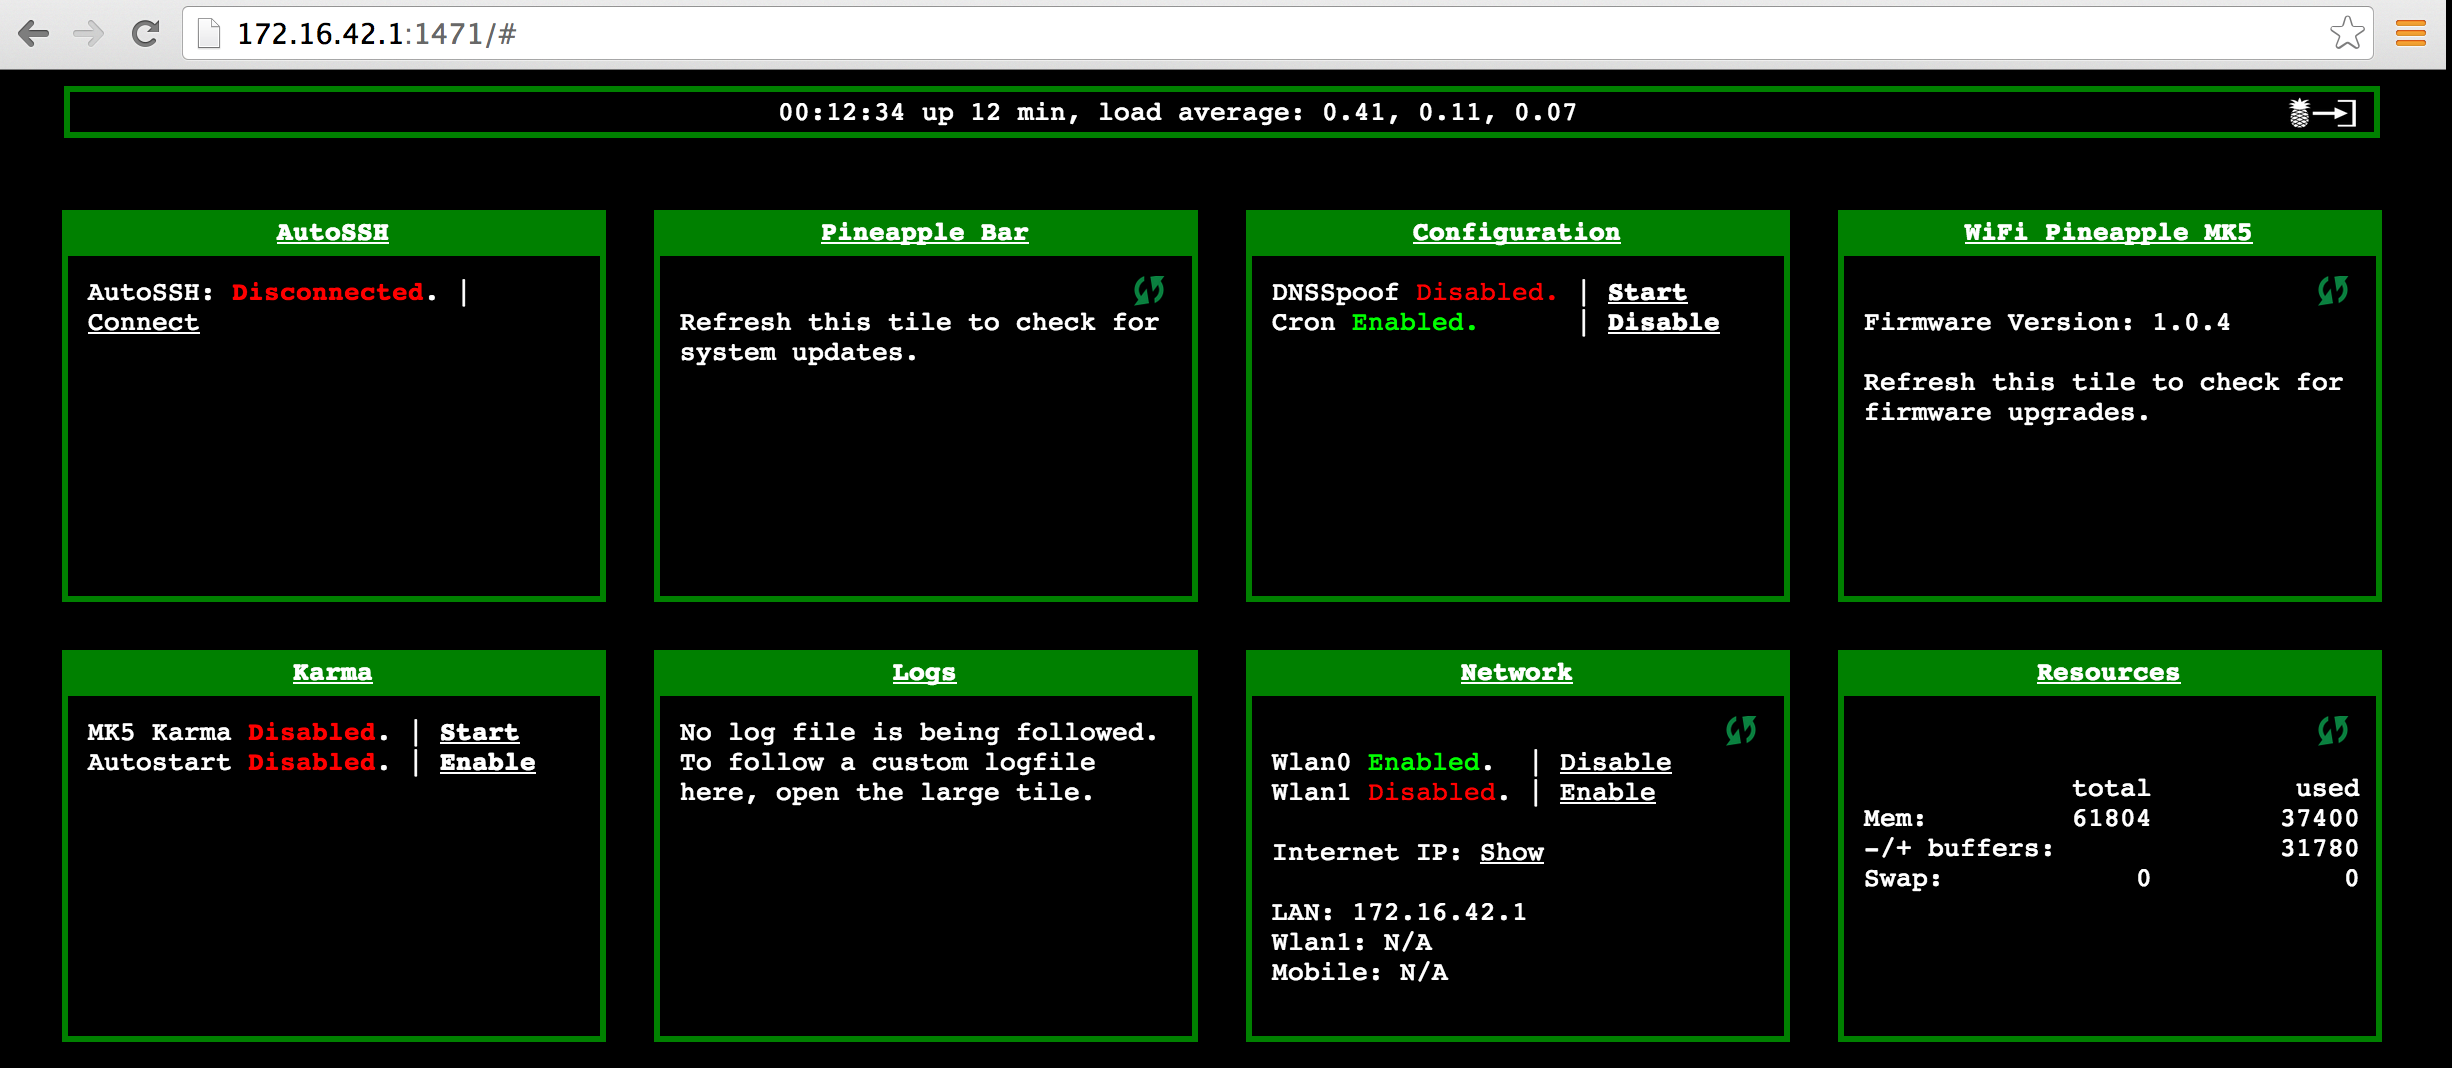
Power it up and connect an Ethernet cable. It will give you a DHCP address on the 172.16.41.0/24 subnet. Open a browser and log into the GUI via 172.16.42.1:1471. You will get a prompt to set a password. Give a new password and accept the agreements. At this point, you should see the main GUI.
Pineapple main dashboard first login
Step 2: Connect to a network
Once inside, you will need to get your Pineapple online. You should see the main Dashboard has a bunch of boxes for each function. The Network box will show both antennas and their status. Enable both and click the Network word to bring up that section. Next select the tab at the top that says CLIENT MODE and you should see other networks you can connect to. Select a network (you may have to refresh the list) and connect (you may have to log in via the password box depending on security for that network). Once your pineapple is connected, you should see the network info below or on the main dashboard under the two antenna status labels.
Step 3: Update the firmware
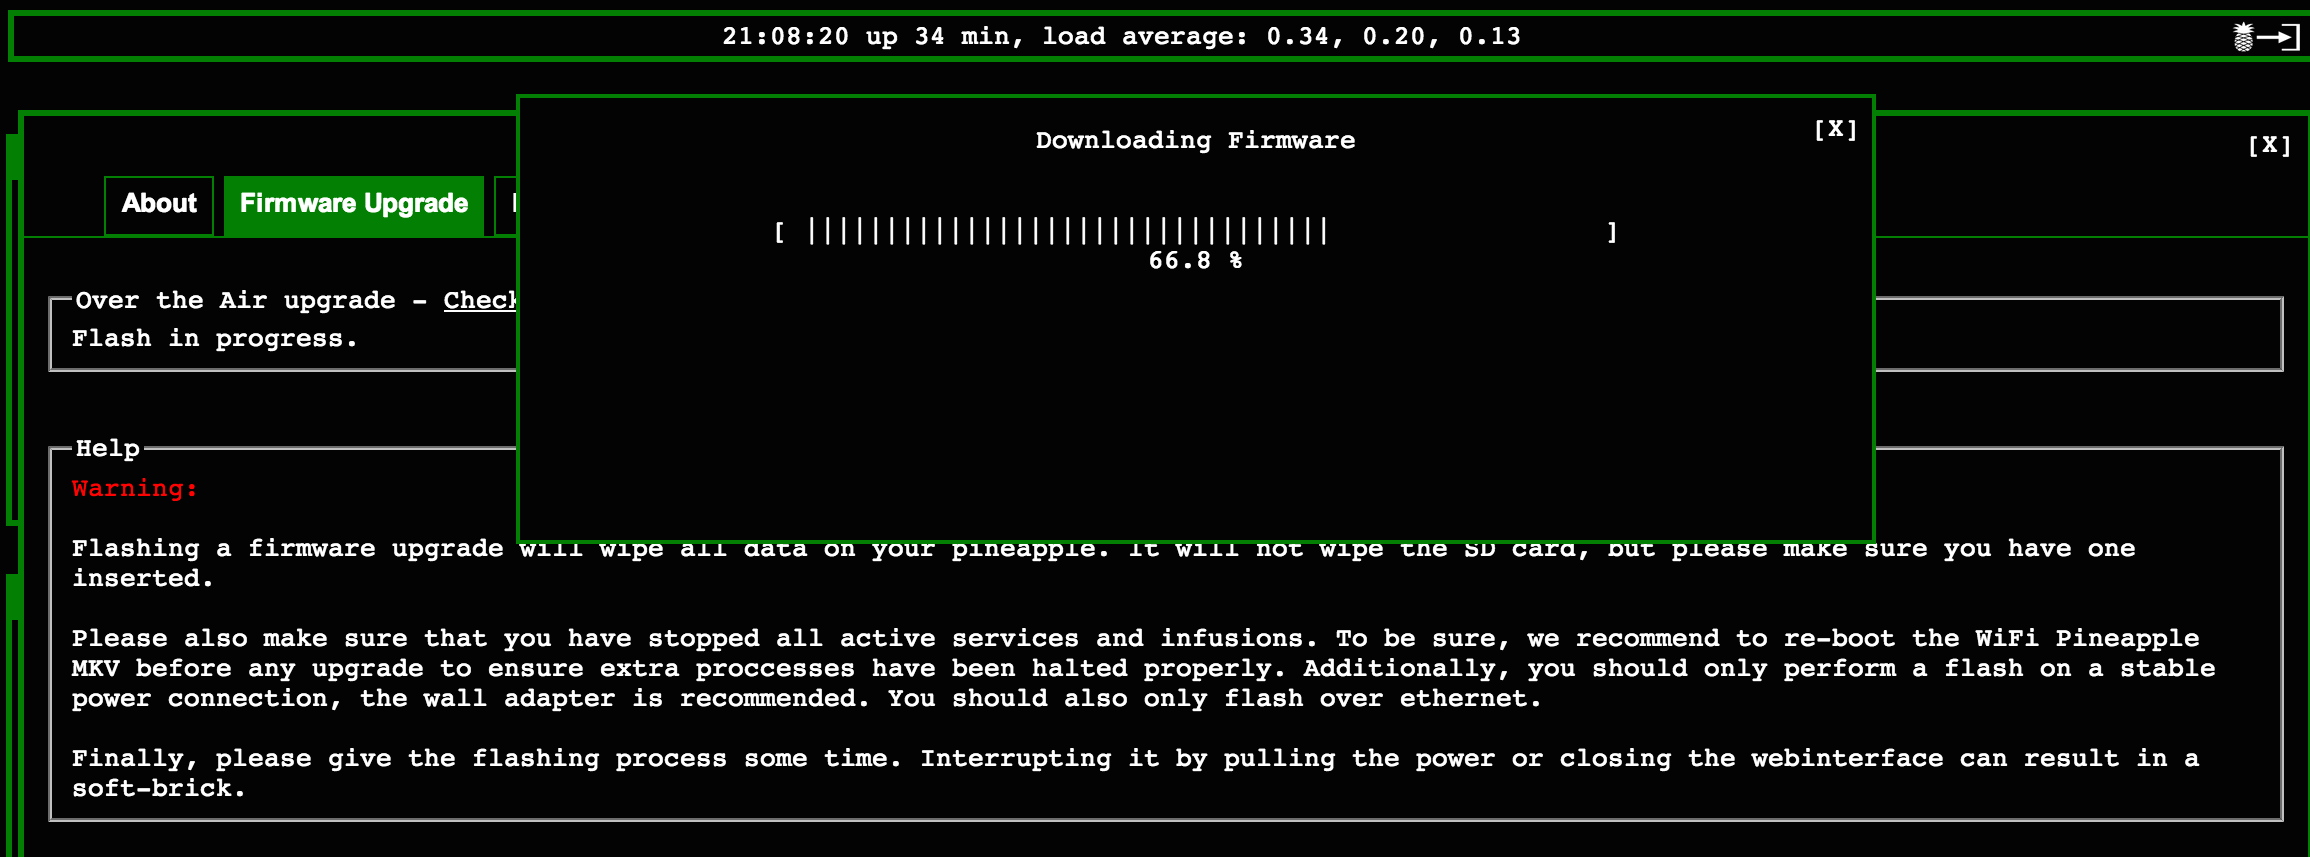
Now that you are online, go to the dashboard and click WiFi Pineapple MK5 to see if there are available updates. You can click the check now button to see if there is an update. If there is one, it will offer two options to install. Click FLASH and let it go through the upgrade process. Once complete, you will be back at Factory Settings so you will have to repeat steps 1 and 2 again.
Pineapple updating the firmware
Step 4: Download add-ons
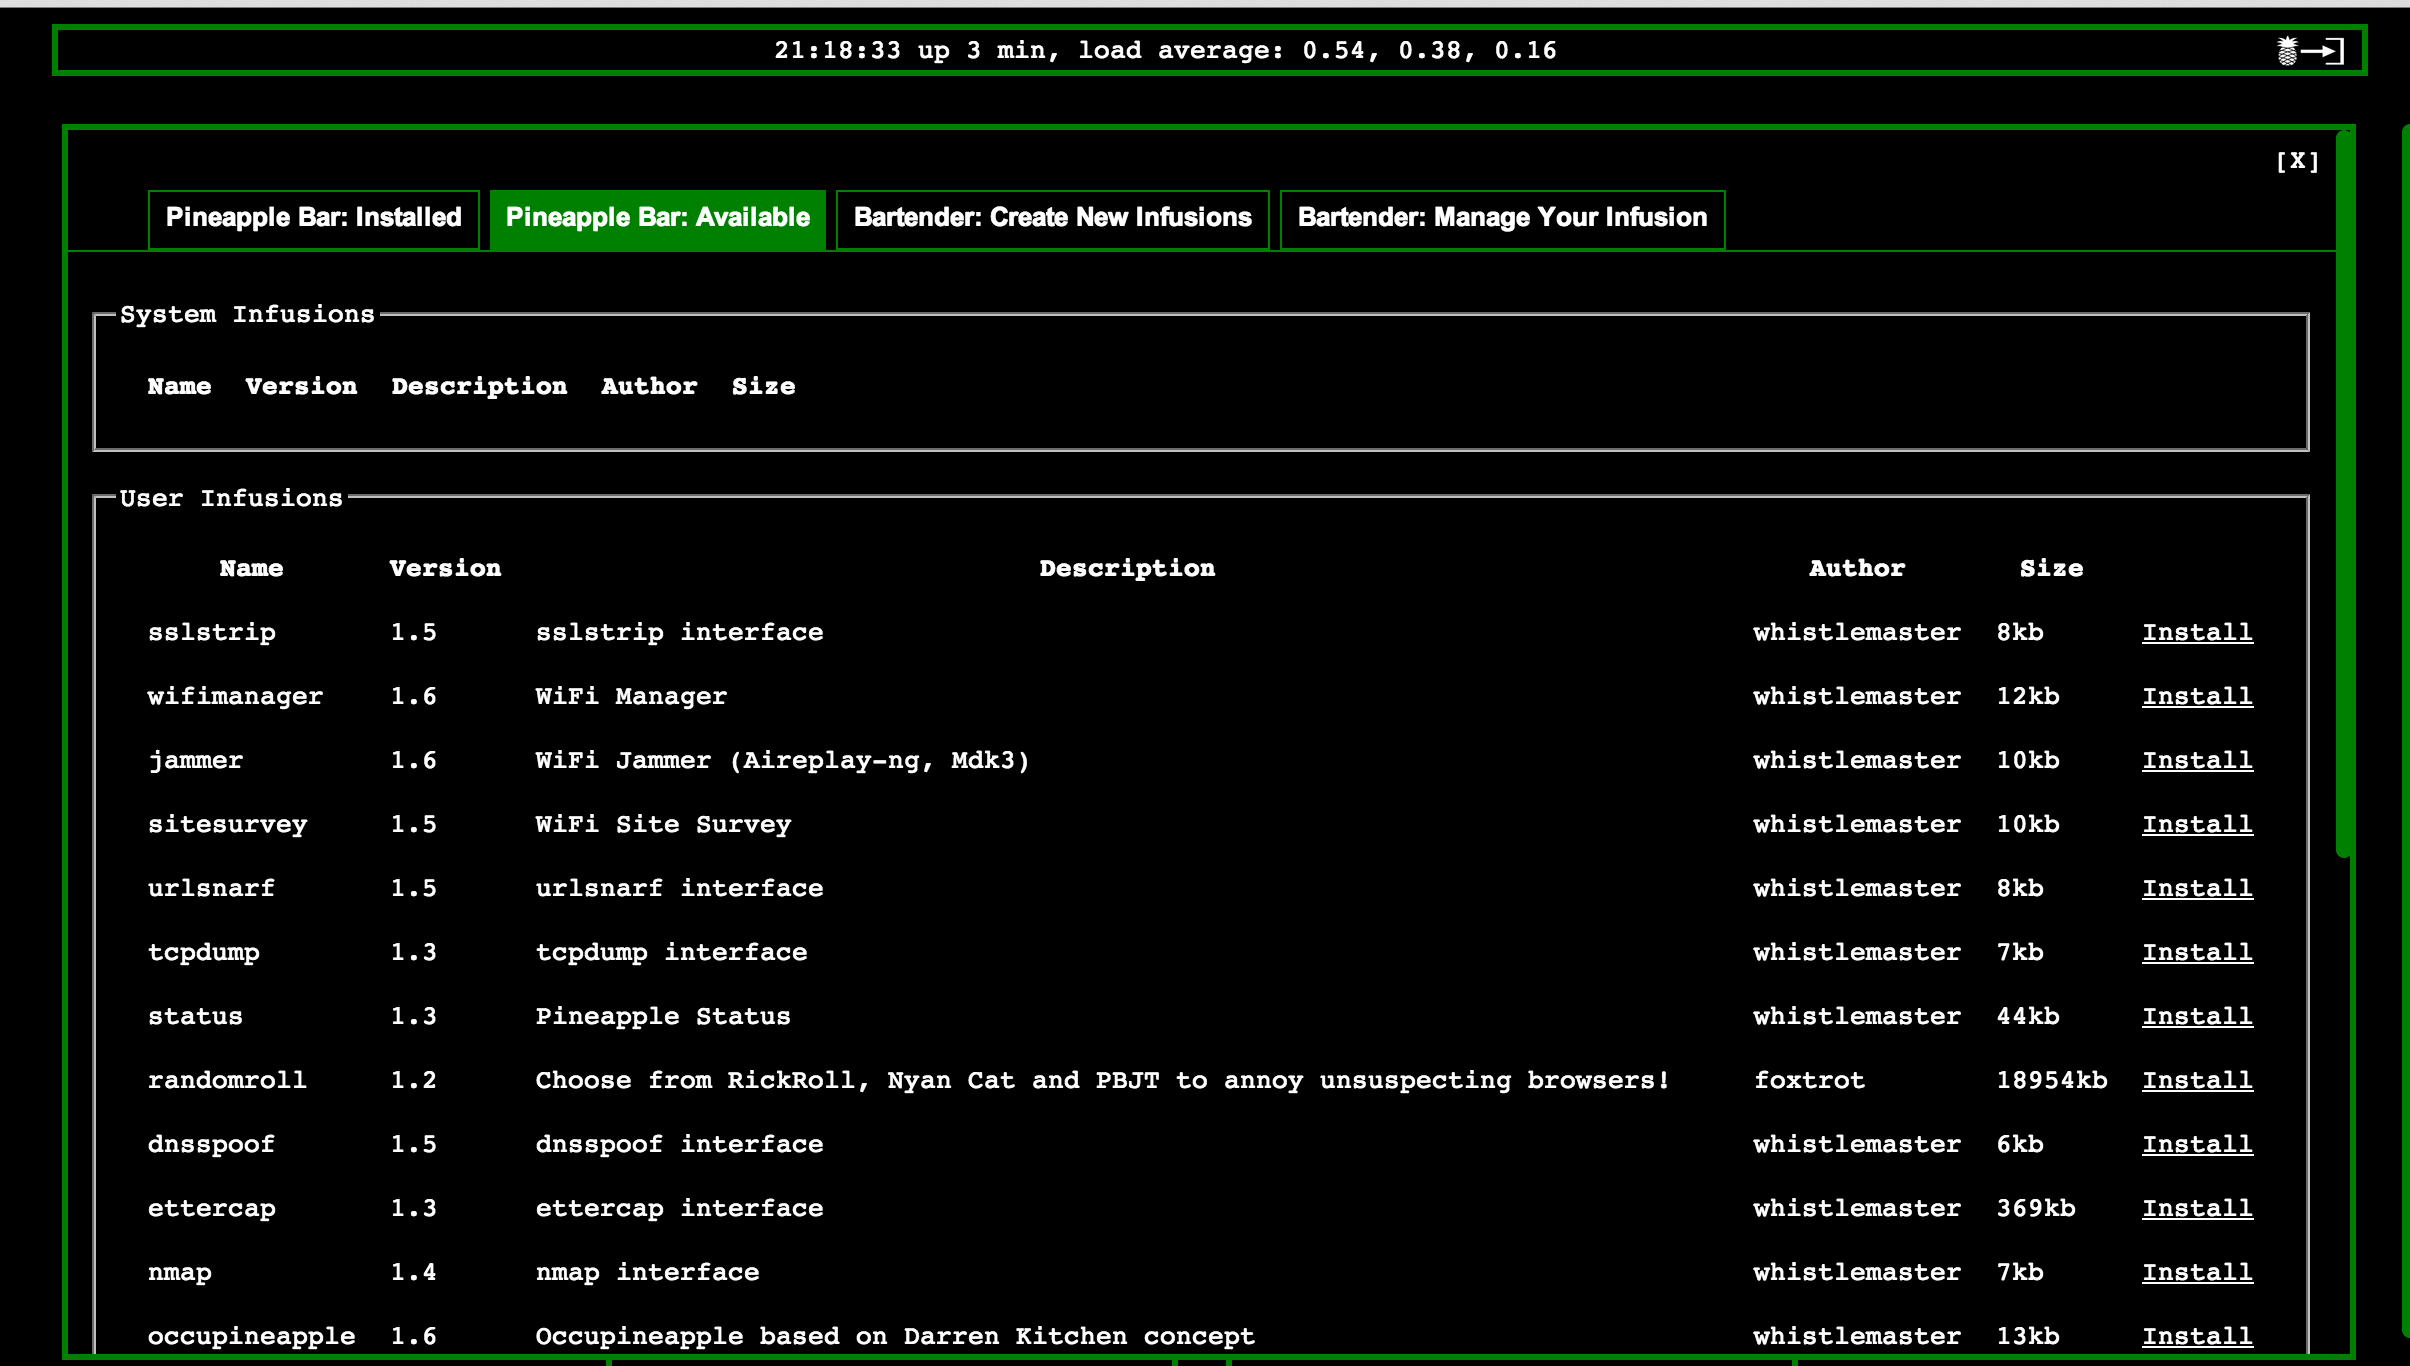
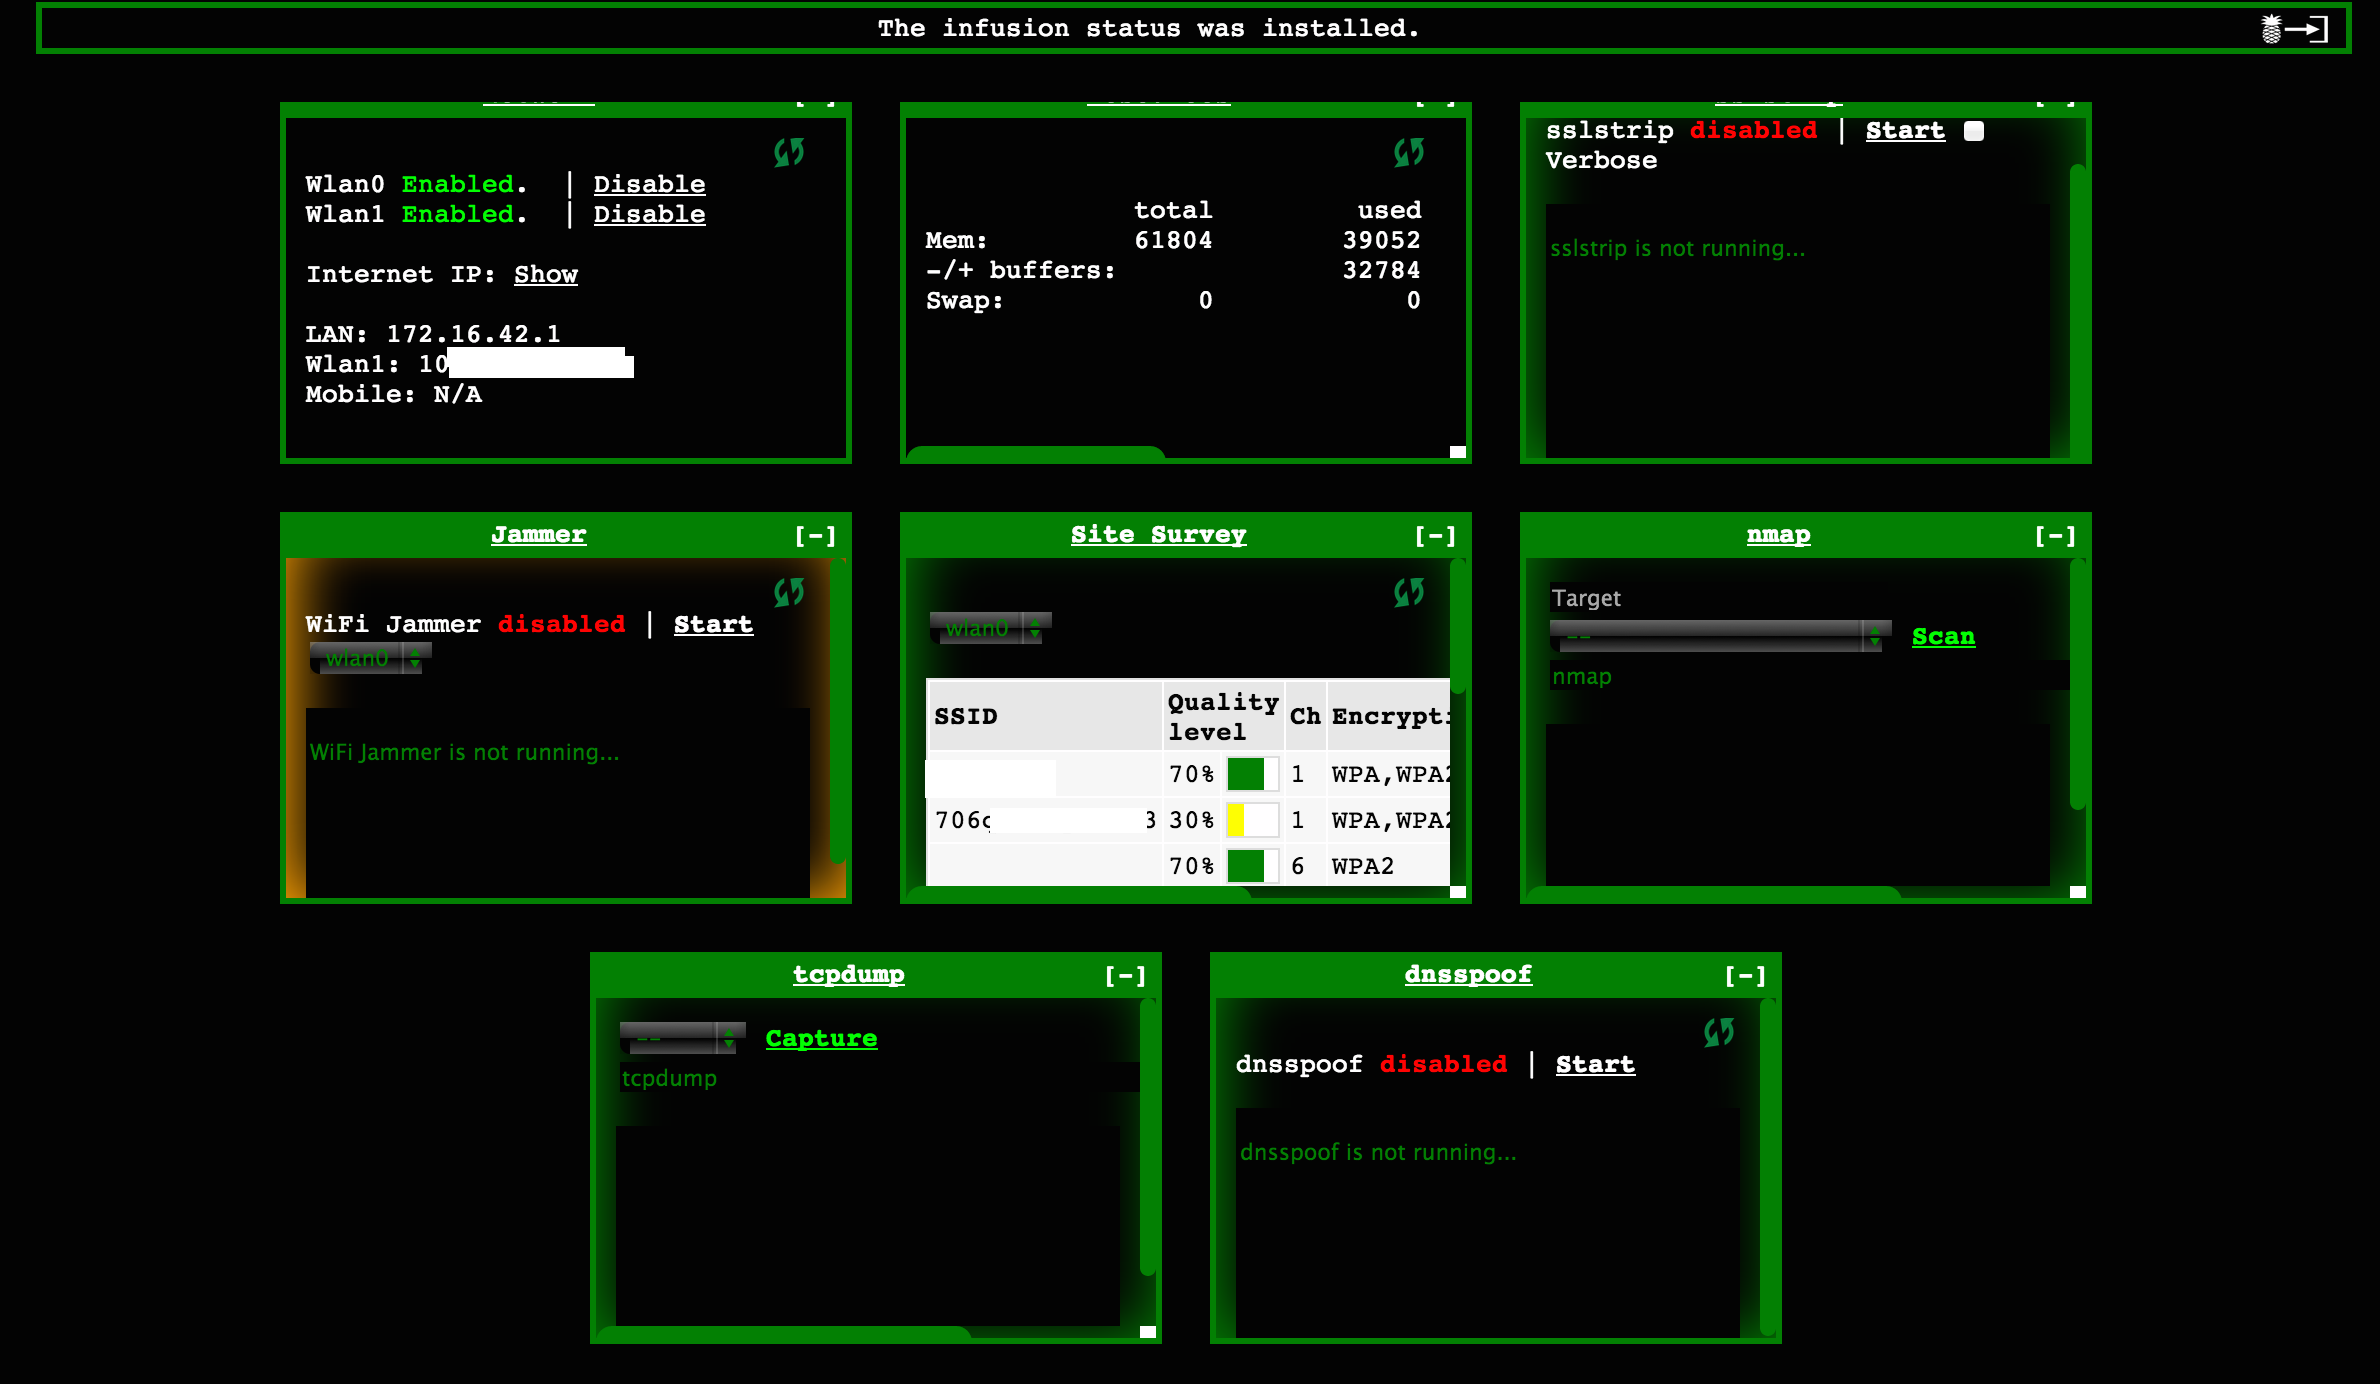
There is a pineapple community developing add-ons or New Infusions that can add new functions to your pineapple. To see what is available, click Pineapple bar and select the tab for Pineapple Bar: Available. For my attack, I downloaded the SSL strip interface and a few other cool things such as a tcp dump and WiFi manager. Once installed, you should see new options on your main dashboard.
Pineapple Infusion options
Pineapple with new Infusions
Step 5: Share network
There are many variations to get traffic from the pineapple through your computer aka sharing the network. This way when a target connects to the pineapple, they can access the network while the pineapple bridges them to a real network. For my example, I’m going to share my WiFi from my apple laptop and select to share that through anything connected to the Ethernet port … such as a pineapple. This is done by going to system preferences, Sharing, selecting where you want to share FROM (Wireless), to computers using (Ethernet) and selecting Internet Sharing.
Step 6: Setup Karma
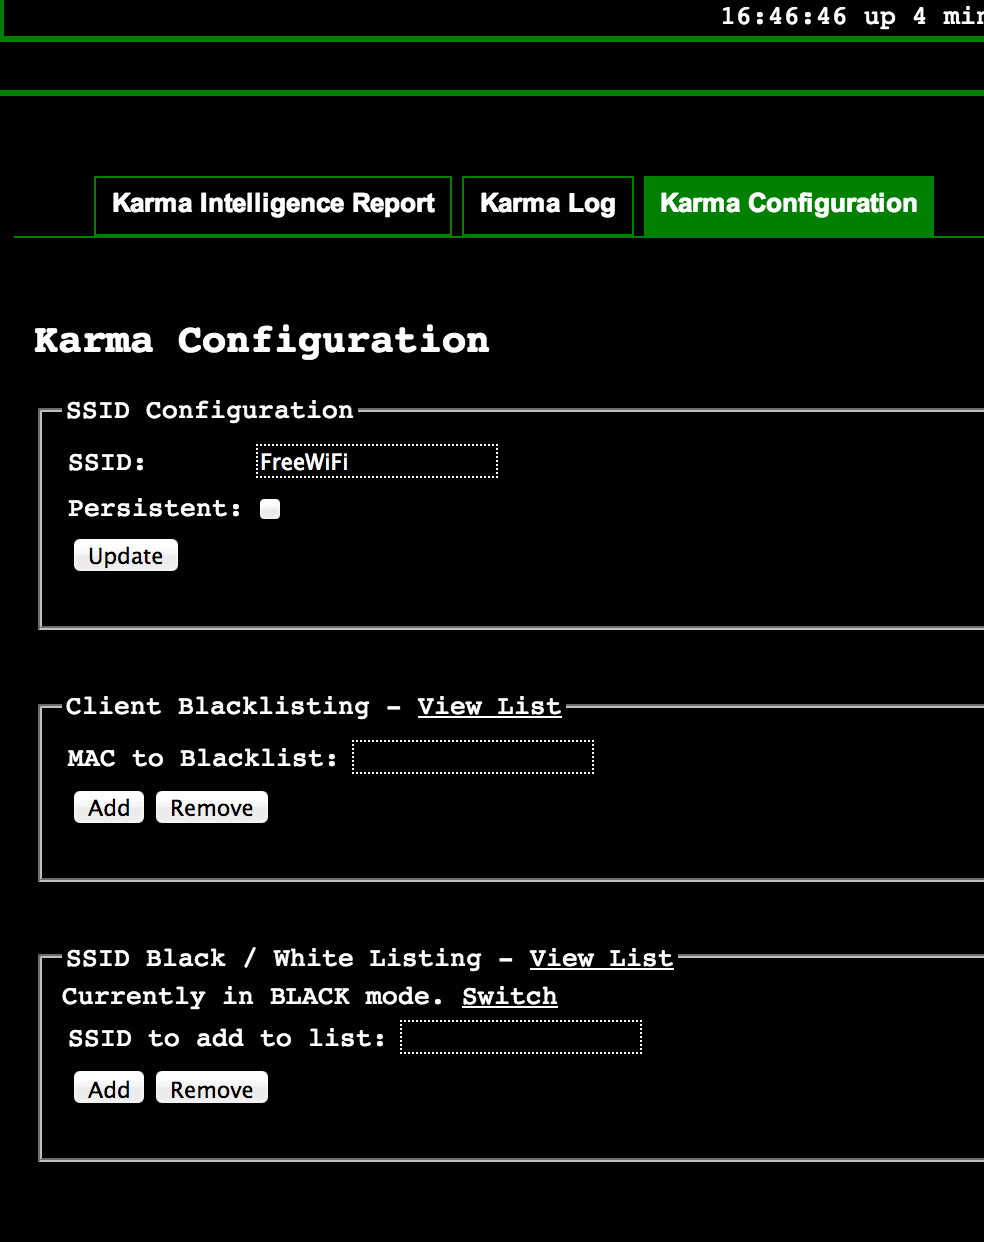
Now its time to setup the hook for your attack. Click the Karma box on the main dashboard. DON’T Enable it just yet! You first need to white list your own wireless MAC address as well as other devices you don’t want to attack or you will own yourself. Click the Karma Configuration tab and provide your wireless MAC address as well as other devices in the whitelist tab. You can also white list SSIDs you don’t want to spoof.
Karma settings in the pineapple
You will also notice the SSID configuration box. This is where you can broadcast whatever name you want such as FreeWiFi. Once you are ready, go back to the main dashboard and click enable Karma. Don’t click auto enable because you may have messed up the white listing and you want to be able to reboot the pineapple in the event you own yourself.
At this point, other devices should see SSIDs they know about (such as their home network) with no security. If anybody connects to a pineapple broadcasted network (FreeWife or anything it clones for my example), you will see them appear in the Karma Intelligence Report found when you click the Karma box on the main dashboard.
Step 7: Strip away encryption.
Now you can see user traffic however anything SSL aka HTTPS will be encrypted. To beat this, you can use the widget for SSL strip to force any attempt to access HTTPS back to HTTP. Click the enable under SSL strip on the dashboard to start the attack. Next click sslstrip and you will see an output tab. Click refresh and it will display any HTTPS requests that have been sent back in the clear. So when somebody logs into Facebook, this will show the request including user name and password.
sslstrip in the pineapple showing two captured Facebook user name and passwords
And that’s it. For $100 dollars and 20 minutes of time, you too can be stealing people’s passwords. The Pineapple can be used for many other evil things so check out HAK5’s website and the pineapple university for more details.
Oh BTW, a recommended defense to this attack is VPN. If your traffic is encrypted, you can’t man-in-the-middle the host.




Nice blog Joey! I recently picked up one of these and have quickly realized how powerful they are. One point I would like to add is that the Karma tool is only useful for attacking an open WLAN, however PSK-protected networks have their own flaws. A good idea to detect the presence of a pineapple is to create a WLAN profile on your device (if possible) named something like “Pineapple Nearby” and configure it for open security along with automatically connect when in range to detect its presence.
Nice blog!
I was wondering, is it true what Chris said about the Karma tool is only useful for attacking an open WLAN? What if you have the password for the wifi, to the university’s wlan for example? Can you then use Karma and the other tools mark V provides? Thanks!
Hi Alex,
Karma works by hearing a SSID and replying back as that with a open network. Karma does not have anything to do with spoofing passwords for a SSID. With that being said, if your university network requires a password … lets say you use WPA2, then your mobile device will know that password and auto connect anytime you are at the University. If you go to Starbucks and connect as a guest, you device will treat that as a lower priority assuming you connect more often to the University and its just a higher priority connection for you. If somebody launches a Karma attack while you are at Starbucks, Karma will see you are looking to see that your device is randomly beaconing for the University network and spoof that. Your device say “hey I’m at the university” and connect to that but it will show the university network connected and open … not running WPA2. Make sense?
This makes absolutely no sense. Could someone email me to walk me through setup?
Do you currently own a pineapple? You should check out the pineapple university for setup instructions. http://hak5.org/category/episodes/pineapple-university
Isn’t the one on the left the mark V (5) and the one on the right is the mark IV(4)? You have the one on the right as the mark III (3)
It is the pineapple III. Here is a post I wrote a while back about it https://www.thesecurityblogger.com/penetration-testing-tools-at-your-next-security-conference-wifi-pineapple-mark-iii/
But that IS the WiFi Pineapple MK4 and not the MK3.